Sharing a Local Dev Server with Your Clients Using MAMP
For a while I’ve been trying to figure out the best way to share my local development environment with my clients. While this may not be the best way, it works for me and may work for you too. Being a one man shop I don’t feel the need to have a local version then a development or staging version. Just the one works for me.
First of all, you’ll need a Static IP Address. If you don’t have one, you’ll need to talk to your ISP about it. If you cant get a static IP, then Showoff.io may work better for you.
I use MAMP Pro to manage my local sites. MAMP allows me to create as many local sites as I want, with as many databases as I need, all using a simple interface. No host file editing necessary. While all the sites I create with MAMP will work for me, they aren’t going to be visible to anyone else. To make them visible, I’ll create DNS entries on my website to point to my computer. I’ll also need to set up port forwarding on my modem.
Setting Up MAMP and Creating Local Sites
Once you download and install MAMP, fire it up and you’ll see its interface. There are 2 settings you’ll need to change.
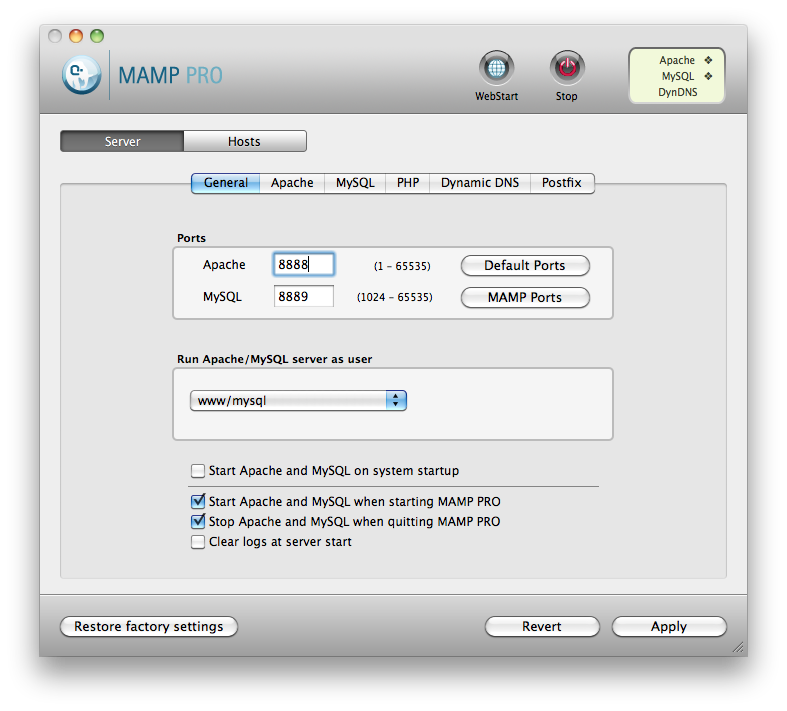
You’ll want to change the Apache port to 80 and change the Apache/MySQL user to www/mysql
Click the Hosts tab and this is where you’ll be able to set up all your sites.
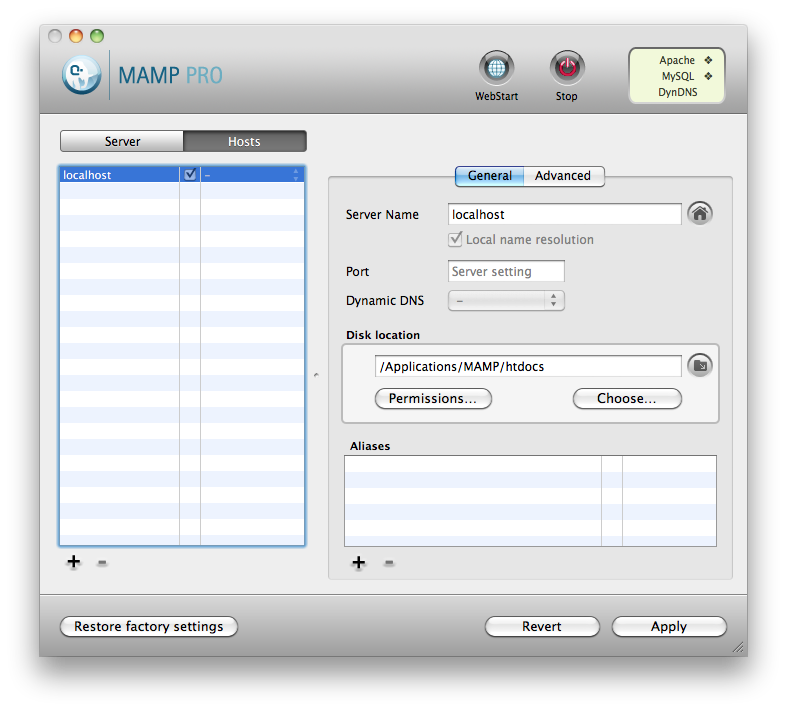
Click the + button at the bottom left of the window to add a new host.
While technically MAMP lets you name the server whatever you want, for the external access to work you’ll have to name it as if it were a subdomain of your website. So, for example I would name it sitename.jvdesigns.com.au. Then just browse to the directory your site is in.
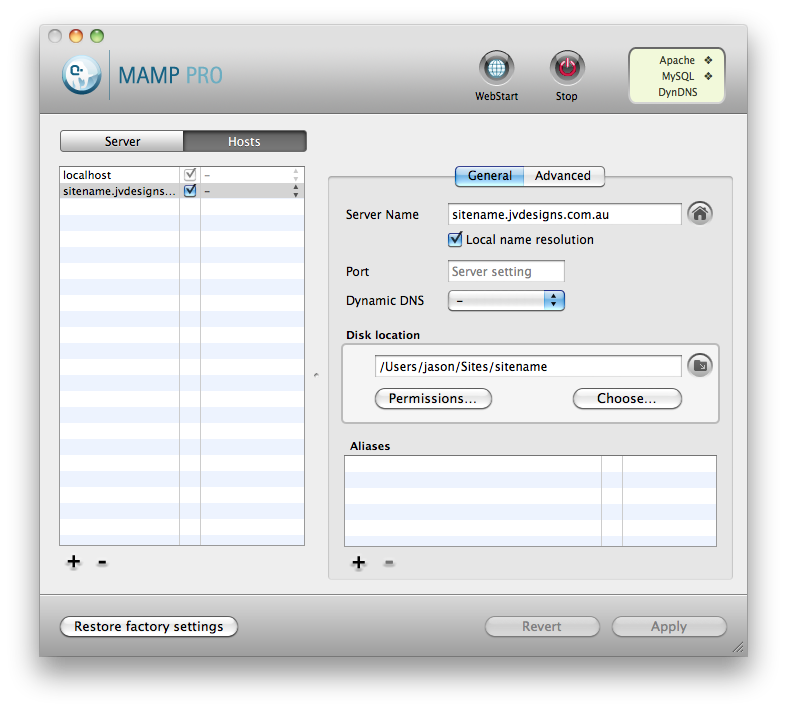
Hit Apply, it’ll ask if you want to restart the servers. Enter your password and it should be ready to go. Try to enter the server address in your browser. If all goes well, you should see your new site.
You’re ready to develop your site locally now.
Setting up DNS entries
I use Media Temple (mt) as my host and DNS server. What you see here may be different for you but the idea is the essentially the same wherever you are.
First thing to do is edit your DNS Zone file. In your (mt) AccountCenter, it’ll be near the bottom of your main domain control panel. In your zone file, you’ll probably see a lot of entries already. Leave everything alone.
You’ll need to add an A Record.

In (mt), click + Add a record. The name of the record will be the server name you entered into MAMP earlier. (sitename.jvdesigns.com.au) Remember, this should have been a subdomain address of your site. The type is A The address or data should be your static IP address. You can find your IP address at What’s My IP.org Save, and you’re done with your zone file. At the moment, you wont see any progress. DNS entries can take a while to propagate throughout the internet.
Setting up Port Forwarding
What we’ve done so far is told the internet that sitename.jvdesigns.com.au should point to your IP address. This is great but once the request comes to your router, we’ll need to point it to your computer which is holding the site.
This part will be different depending on the router you’re using but essentially its the same thing for everyone.
First of all, your computer running MAMP will have to have a static address, not automatically assigned by DHCP. To do this:
- Go to System Preferences
- Network
- Choose your internet connection
- click Advanced… in the bottom right
- Go to the TCP/IP tab and take note of the IPv4 address
- Configure IPv4 to either DHCP with manual address or Manually
- Enter the IPv4 address
Then to set up port forwarding, log in to your router and you’ll need to find a Port Forwarding section. Sometimes, its combined with Port Triggering.
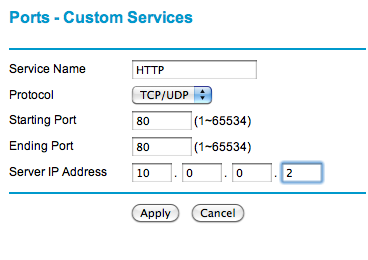
Create a new service and enter the following:
- Start port: 80
- End port: 80
Server IP address: the IP of your computer with MAMP Your router may reboot after this.
Give it a whirl
Assuming everything has gone according to plan, you should be ready to go now.
To test it out, try to hit the address from a browser outside of your local network.
Remember, DNS may take up to 48 hours to propagate.
You can flush your local DNS on a Mac by opening up terminal and typing dscacheutil -flushcache or on a PC by opening command prompt and typing ipconfig /flushdns.
Comments
blog comments powered by Disqus